写这篇文章的根因是:1、公司没有购买JetBrains;2、最近破解JetBrains比较困难,尤其是获取激活码,猜测应该是国外公司对盗版打击力度变大,从而导致国内一些破解方式和获取激活码方式无效;3、给其他使用go开发的朋友们提供快速搭建指引,减少采坑耗时。
折腾了半天,实在没法,只能用vscode进行开发了。接下来就说下如何使用vscode进行go项目开发,主要是使用gomod方式。(注:以下所有操作均在win10_64环境下)
1、下载go并安装
https://golang.org/dl/

2、配置环境变量
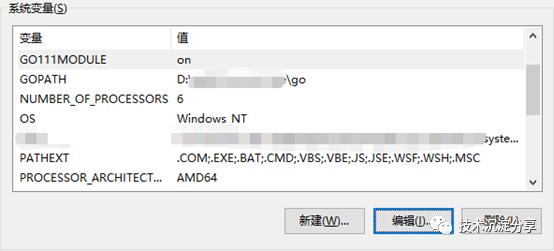
2.1设置GOPATH的环境变量
2.2 设置系统环境变量GO111MODULE=on
2.3 设置GOROOT,GOROOT是go的安装路径,安装完成后会默认加到Path下 
命令行查看下是否生效

3、下载vscode并安装
https://code.visualstudio.com/
4、打开vscode安装go插件

5、vscode配置go编译环境
launch.json配置如下
{

    "version": "0.2.0",

    "configurations": [

        {

            "name":"LaunchGo",

            "type": "go",

            "request":"launch",

            "mode": "auto",

            "remotePath":"",

            "port": 5546,

            "host":"127.0.0.1",

            "program":"${fileDirname}",

            "env": {

                "GOPATH": "D:/SourceCode/go",

                "GOROOT": "C:/go"

            },

            "args": [],

            //"showLog": true

        }

    ]

}
Setting.json配置如下
{

    "editor.wordWrap":"on",

   "editor.minimap.renderCharacters": false,

    "editor.minimap.enabled": false,

    "terminal.external.osxExec":"iTerm.app",

    //"go.useLanguageServer": true,

    "go.docsTool":"gogetdoc",

    "go.testFlags":["-v","-count=1"],

    "go.buildTags": "",

    "go.buildFlags": [],

    "go.lintFlags": [],

    "go.vetFlags": [],

    "go.coverOnSave": false,

   "go.useCodeSnippetsOnFunctionSuggest": false,

    "go.formatTool":"goreturns",

    "go.gocodeAutoBuild": false,

    "go.goroot": "C:\\go",

    "go.gopath": "D:\\SourceCode\\go",

   "go.autocompleteUnimportedPackages": true,

    "go.formatOnSave": true,

    "window.zoomLevel": 0,

    "debug.console.fontSize": 16,

    "debug.console.lineHeight": 30,

    "[javascript]": {

        "editor.defaultFormatter":"HookyQR.beautify"

    },

    "[html]": {

        "editor.defaultFormatter":"HookyQR.beautify"

    },

   "terminal.integrated.shell.windows": "C:\\ProgramFiles\\Git\\bin\\bash.exe",

    "editor.fontSize": 17,

}
注意:以上两个配置文件里的goroot和gopath填写你自己的。
其中 “terminal.integrated.shell.windows”: “C:\ProgramFiles\Git\bin\bash.exe”, 设置vscode的terminal为bash模式,默认使用的是powershell,比较难用,所以改成了bash
“editor.fontSize”:17, 设置编辑器字体大小
6、设置go mod
默认GO111MODULE为空,因此通过在系统环境变量设置GO111MODULE=on,或者打开vscode,在terminal下通过export GO111MODULE=on即可完成对go mod的支持。
7、示例:helloWorld
7.1 创建helloWorld目录
7.2 vscode打开helloWorld,并进入terminal执行go mod init helloWrold,go mod tidy
 执行完成后,按ctrl+F5执行,或F5进行debug

以上就是windows环境下vscode+go mod 开发环境搭建过程。
注:如果遇到编译时,遇到unrecognized import path *** 443: connect: connection timed out,最好在编译机上执行以下操作
export GOPROXY=https://goproxy.io